
Finally i am writing on a DevOps subject a little bit. There will be many posts in the future about DevOps so make sure you subscribe to stay tuned.
Last week i’ve accepted a full time job offer as DevOps Engineer from a company that seemed to be doing the right way. I am very excited to learn so many new things from them and hopefully i will find some time to share some of that knowledge here on my website.
What is a Bastion Host?
So before I go into explaining how to make a bastion host in AWS let’s make sure we understand what is a bastion host first ok? I wanna make sure there is no confusion, bastion host is not the same as a jump server/host. There seems to be some confusion about that on the internet even though it’s clearly explained. As far as my knowledge goes, a bastion host is a server/instance/machine that is placed outside of your security zone that you’ve configured. It’s designed to be facing the internet and devices as well. Can even be used as a honeypot against hackers. Security-wise it looks week but it’s supposed to be looking weak. The most common use cases for bastions are:
- Devices
- FTP Servers
- VPN Servers
- Honeypots
- DNS Servers
When it comes to a Jump Server/Host, it’s mostly being used to breach the gap between two configured security zones. They are being designed so that there is a way inside the configured security zone from DMZ. This way there is only one known and very often filtered way inside the specific server that has to be from the outside in order to be maintained, updated, and so on…
Creating a Bastion Host
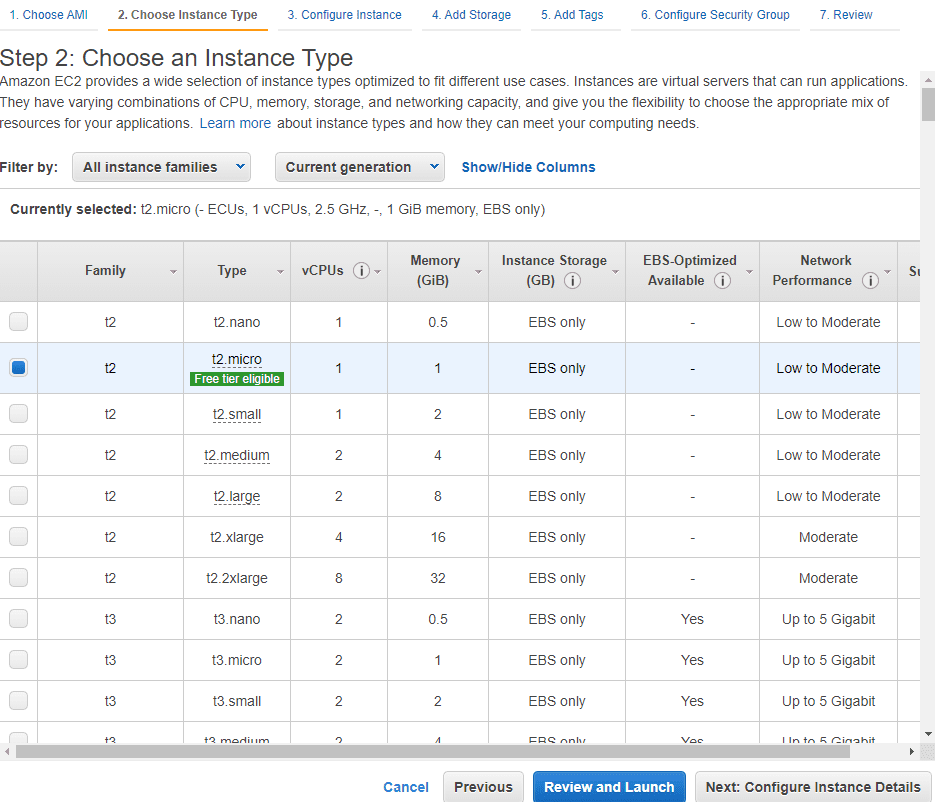
Step 1: Create an EC2 instance inside your AWS account. You can use whatever way you prefer (CLI, Terraform, etc…) but I will be using AWS console for easier explanation. I will also use t2.micro with Amazon Linux AMI since it’s free. You should adjust your instance performance of course depending on your usage and services you are going to run on this Bastion host.
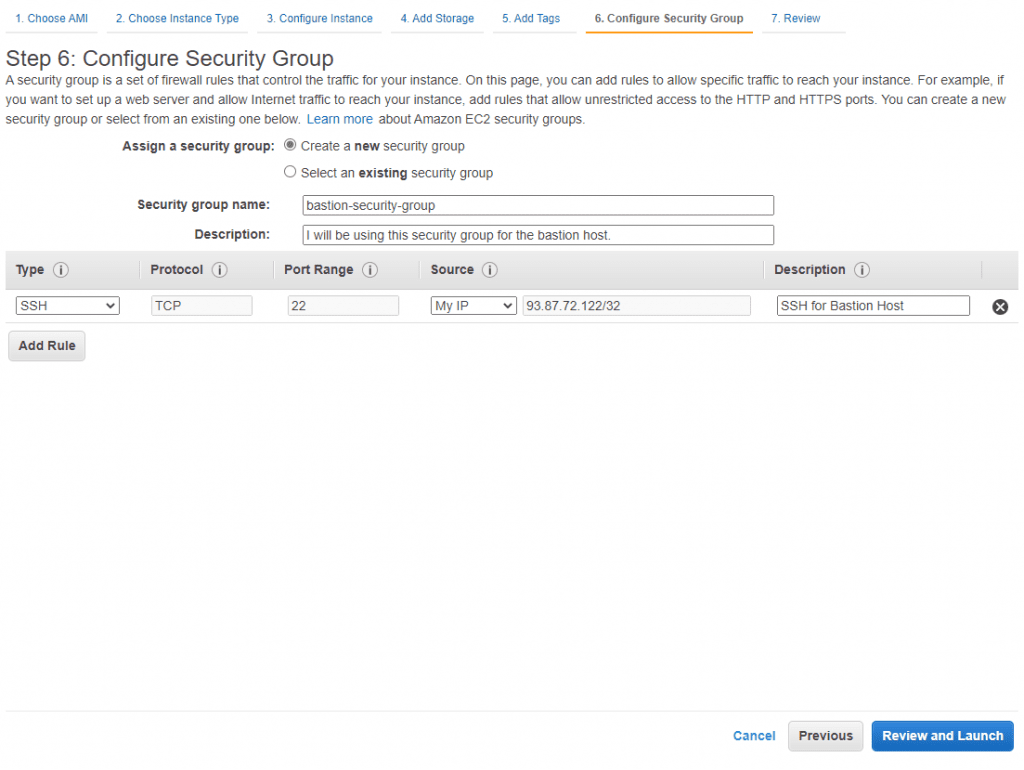
Step 2: Don’t click Launch just yet, click on Next, choose the amount of storage that you might need, I will just go with 8GB for the purpose of this article. Click Next again, create a tag if you are going to use one. and then click on Next: Configure Security Group. Now, this is where you will want to tweak some settings. By default, you will have a generated security group name and SSH TCP on port 22. I recommend you change the security group name and write a description so that you can easily recognize it later. In Source make sure to change it and choose My IP. Inside the description, you can write about how and what you are going to use this SSH for. I know that for most of you out there, writing docs, descriptions, and titles might sound like a boring job, and I do agree with you that it is but it is as important as everything else when you are working inside a bigger team or company. It’s easier for management later so just do it. Here is how I did it.
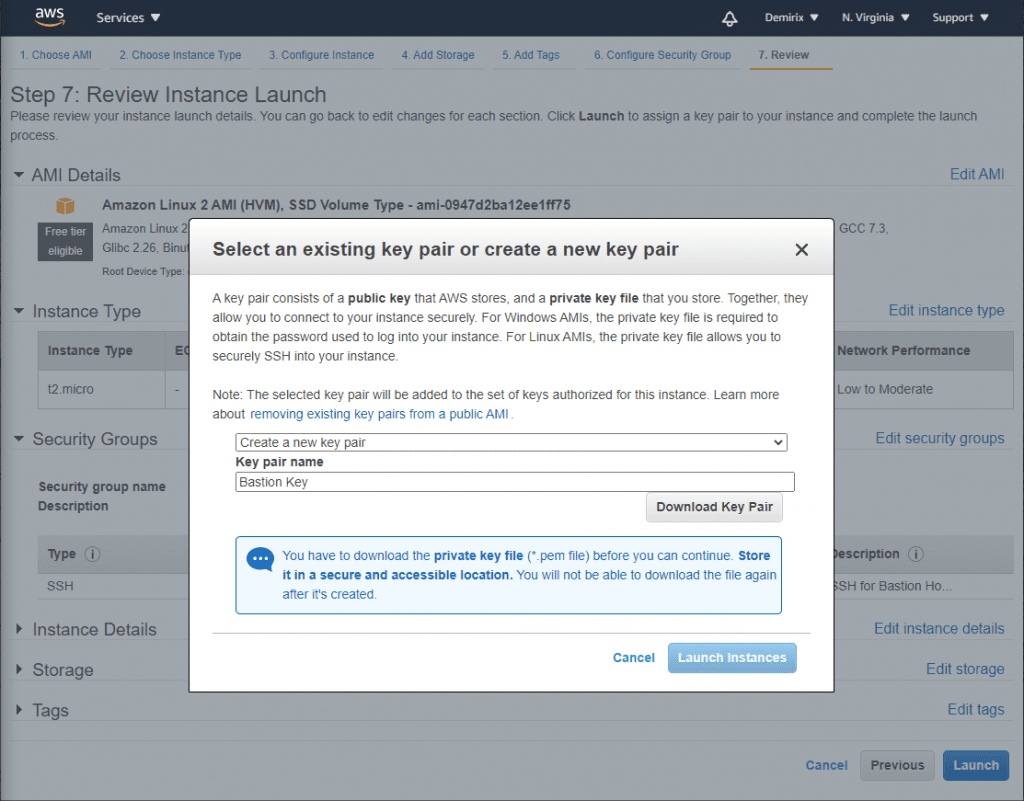
After this, you will come to key creation settings. I recommend that you create a new key that you will be using only for this bastion host/server. I also recommend that you switch the keys periodically.
Step 3: When you are done, next thing you need to do is change security setting of the instance you want your Bastion Host to be over of. Go to your existing instance and change inbound SSH rules to the Bastion’s Host IP Address.
Step 4: Now depending on your environment if you are doing this on the server or locally, change your local config file in ~./ssh/config usually and add the following:
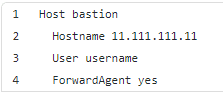
Where hostname is the IP address of the bastion host/server you’ve created earlier and username is one you use to log into the server of course. Usually ubuntu or ec2-user.
This will allow you to SSH into your bastion server by simply typing ssh bastion inside your command line. After you do so you will be able to SSH into any of your existing instances (you have to add inbound rules mentioned above before) which are now ONLY available to connect to via bastion server.
There you go now you have a more secure way of connecting to your own server. I want to mention that as I am learning, I will be adding more information to this article so feel free to come back from time to time and check what have I added.
0 Comments