
So I am back to document yet another approach to the solution I might need often in the future. In my case, the scenario for a production system that was using a few databases was that the whole system should be started at 7 am and stopped a 6 pm as per the client’s request.
So how did I do it? The short story is, I’ve used the Lambda function with CloudWatch secured with the strict policy attached to a role. So without any further ado, let’s dive deeper and set it up together again for the purpose of this article.
IAM Role
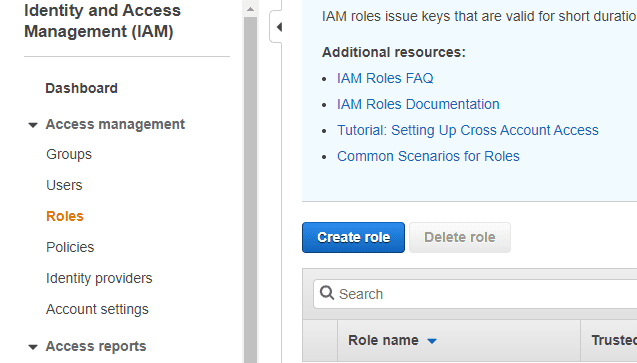
As per every other automated service, it’s highly recommended to make a separate IAM role and then later attach a strict policy to that role. So go on and click on Create role inside Roles of IAM dashboard.
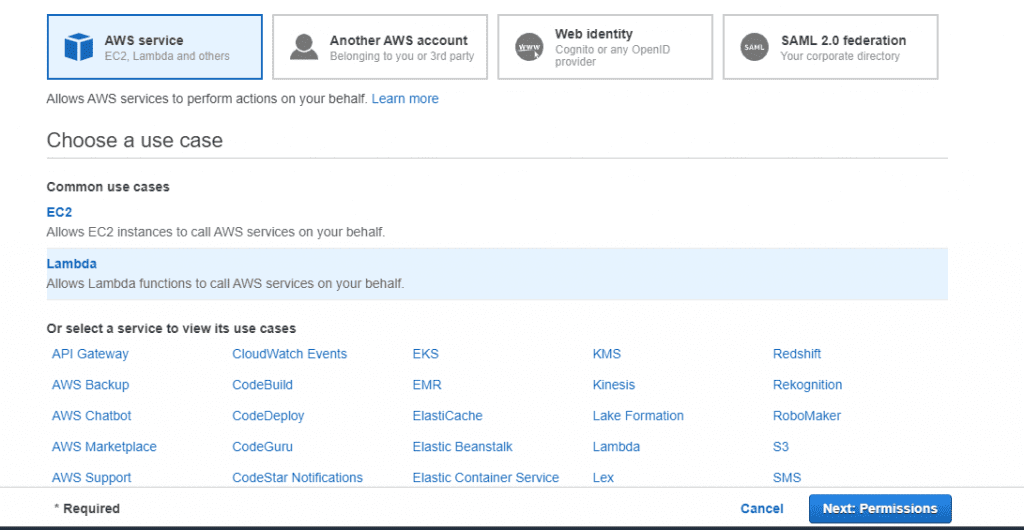
You will get a common use cases offered to you but in case you don’t see anything go on and choose Lambda.
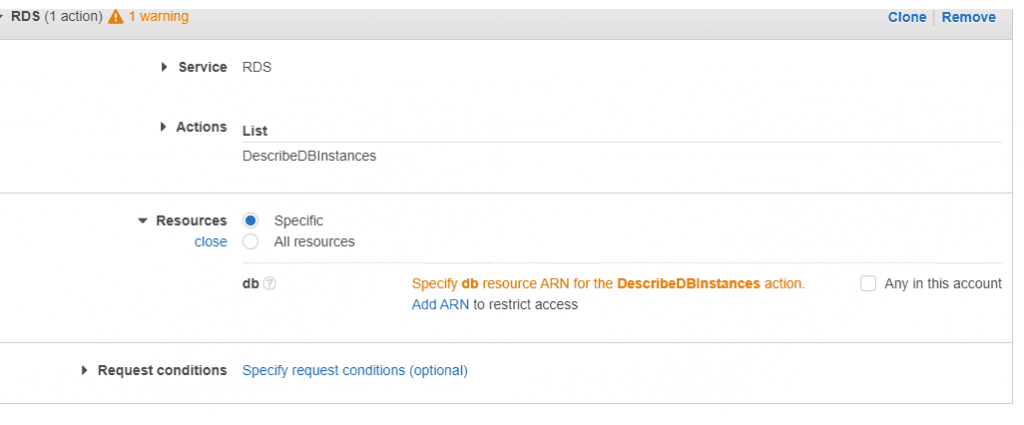
Click next and you will be offered to create a policy. For the client, I had to create one for RDS and one for EC2 services but you could merge them eventually. It’s a good practice not to nest a lot of services together for easier debugging in the future and it’s generally easier for the new members to pick up the pace when they join your team. So click on Create policy and under Service search for RDS and click on it. You will see an input field “Filter actions”. Go and add the following:
- DescribeDBInstances – You will need this in order to be able to read RDS database name.
- StopDBInstance – You will need this in order to be able to stop RDS database.
- StartDBInstance – You will need this in order to be able to start RDS database.
Once you’ve done that, it would be good to go on and set up specific resource this policy can be applied on. Choose Specific right from the Resources option and click on Add ARN in order to add ARN of the database you are going to be handling, I mean stopping and starting on a daily basis or so.
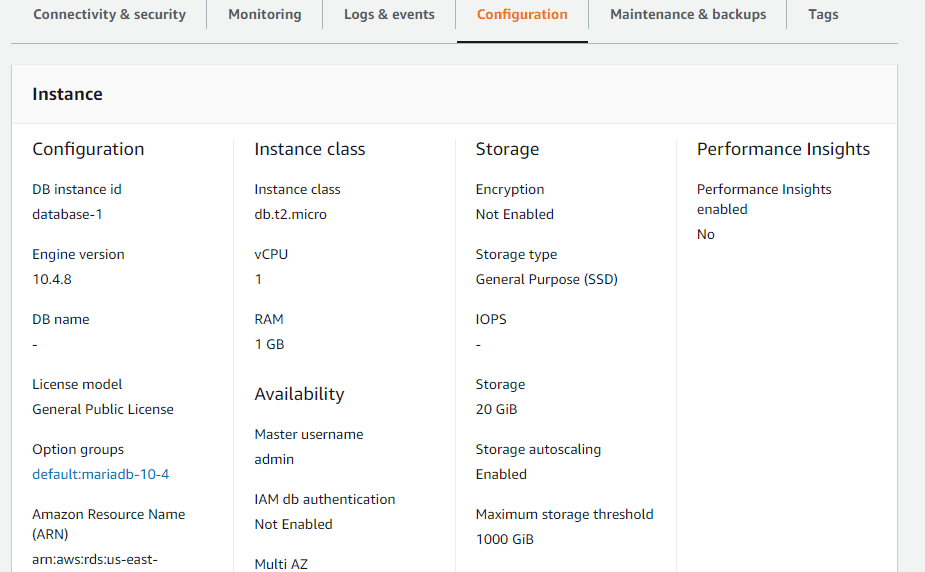
If you are wondering where can you find the ARN of your database. Go and click on your database, then under the Configuration tab inside the Configuration column, you will see Amazon Resource Name (ARN). You will see it in my picture all the way down on the left.
So once you’ve done all this you will be back on the Create role screen where you will have to name your role. I recommend you name it so that you can quickly find it later. For example rds-stop-start or something like that.
Lambda Function
So once we’ve created the permissions we are going to need and use we will have to write a Lambda Function code in order to automate all the tasks for us. I recommend once again to split the function into two parts, one to stop and one to start RDS instances. Of course, you can write it inside the same function but yet again, it’s just easier to follow and less prone to errors if you are doing things the simpler way.
So go on create a function, name it, choose Python, and let’s get into the code. I will show you the final code which is more or less easy to understand. Python is using Boto3 in order to handle all the events. You can find RDS specific Boto3 documentation here.
import json
import boto3

#defining boto3 connection
rds = boto3.client('rds')

def lambda_handler(event, context):
    rds.stop_db_instance(DBInstanceIdentifier='YOURDATABASENAME')
Important to mention is that you should replace your database name inside DBInstanceIdentifier with your database name, not your database ARN like I’ve seen people make mistakes few times. So that’s all for code now, for the start function you will have to create a new one and replace stop_db_instance with start_db_instance and that’s all.
CloudWatch
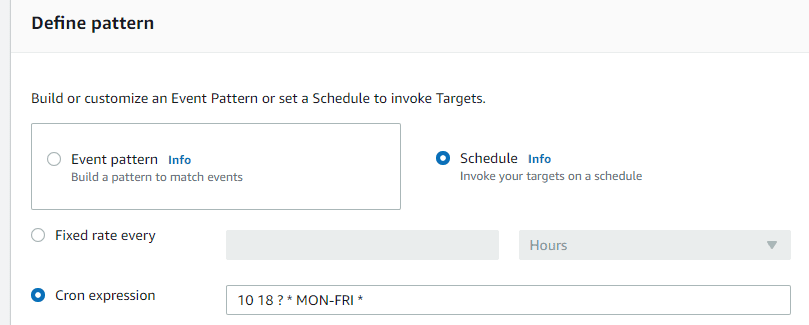
Now that we wrote the code for the function we need to click on Add Trigger and create a CloudWatch event. Name it as you wish so that you could find it easily later. Under Define pattern choose a Cron expression. Now depending on your needs, you will have to write your own CRON but I had to stop it 10 minutes after all servers are down which is 18:10. Always take into consideration the time it takes for any resource to be stopped, started linked, or whatever. It’s neve instant so when automating your infrastructure make sure to include this time tolerance in your setups.
Next thing you have to do is choose Lambda function and then select the Function you wrote above few minutes ago.
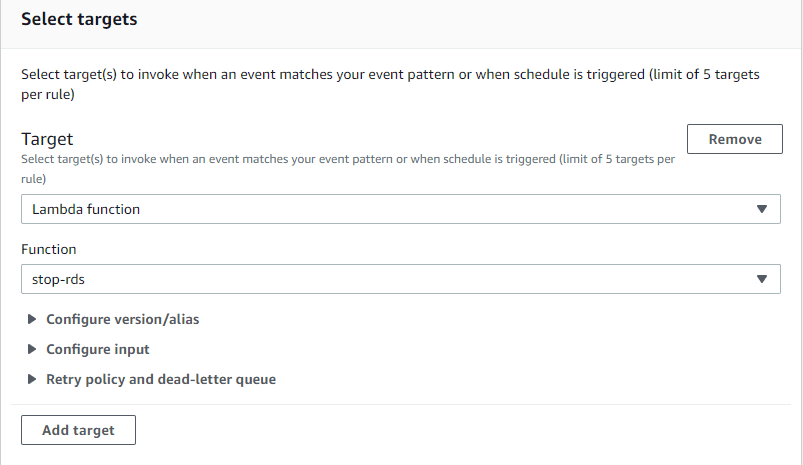
After that, you can add tags if you want and finish creating the CloudWatch event. You will have to do this again for your start Lambda function as well.
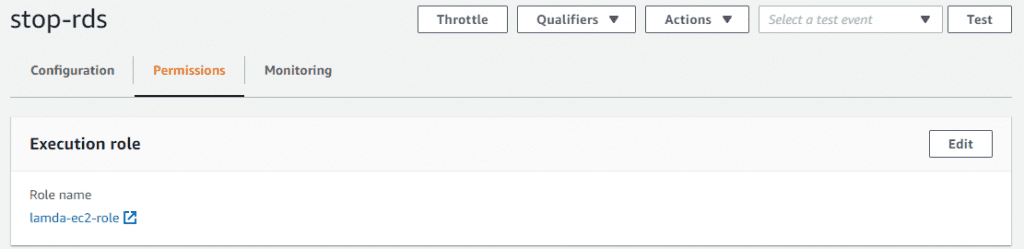
So back to the Lambda function you were writing, an important thing to mention is to not forget to choose your role that contains all the specific permissions that you’ve set up at the start of the article. You can find it under Permissions inside the Execution role.
So that would be all for now, I might be coming back to this article as things change in order to keep everything up to date. If you have any questions feel free to contact me and I will be more than happy to help you out.
0 Comments